|
|
Post by bangerboy on Sept 2, 2008 13:59:11 GMT -1
POST UP ALL OF YOUR TIPS AND TRICKS HERE before painting a model, lift the front of the roof up with pliars. this gives the "hiab damaged" effect  now its your go, type away! |
|
|
|
Post by Dan on Sept 2, 2008 14:02:06 GMT -1
drill the base and remove the shell from the base and wheels to avoid getting paint on them.
|
|
bangerkid45
Part of things
 Zotez' Evil Apprentice
Posts: 201
|
Post by bangerkid45 on Sept 11, 2008 19:06:22 GMT -1
If its a police car and has a light bar, and there are holes when you remove it, put a piece of plasticard under it, and fill in the holes with milliput  |
|
|
|
Post by snakey13 on Nov 1, 2008 13:47:58 GMT -1
Get a flat lid of somesort and measure distances between wheels and make holes in the lid where the wheels go. To easily paint without the car moving if you dont want to remove the shell.
Also you can chop down an Arial for an easy made H-Frame.
|
|
|
|
Post by garnett111 on Nov 12, 2008 16:39:29 GMT -1
i use LARGE machsticks for my Hframs one LARGE machstick will make a good Hfram with a little bit of super glue.
|
|
|
|
Post by Dan on Nov 12, 2008 18:33:49 GMT -1
use a pencil for sign writing, just dip in some paint and away you go!
|
|
|
|
Post by snakey13 on Nov 17, 2008 13:37:48 GMT -1
drill the base and remove the shell from the base and wheels to avoid getting paint on them. How exactly should I do this, Dont want to ruin the models lol |
|
|
|
Post by Dan on Nov 17, 2008 15:28:25 GMT -1
drill the base and remove the shell from the base and wheels to avoid getting paint on them. How exactly should I do this, Dont want to ruin the models lol drill the rivits that hold it together, or just unscrew the screws if it has them ;D |
|
|
|
Post by Zotez on Nov 17, 2008 16:08:34 GMT -1
Drilling Out a model:1) Firstly take the model and hold it upside down on a flat surface which will not move with vibration. 2) if the rivits have an indent in them, skip to step 4 3) get a small drill bit and drill out the centre of the rivit 4) use a drill bit that is slightly larger than the rivit to drill it away 5) take car apart Note:if the car does not come easily, DO NOT force it with a screwdriver, you may bend/snap the base and ruin the model.Hope this helped. 
|
|
|
|
Post by snakey13 on Nov 17, 2008 16:35:10 GMT -1
Cheers mate, top stuff. probably sounds easier than it is bit I'm sure I'll be able to do it ....Still propa chuffed bout that Roller lol Nice 1!! |
|
|
|
Post by Dan on Nov 18, 2008 15:26:05 GMT -1
it is a good idea to keep all the bits for the car together (inside the car held together with tape is best i think)
|
|
|
|
Post by brad162 on Nov 18, 2008 17:37:17 GMT -1
i use aluminium for the door bars if the cars are IE 1:24 scale (quite big cars) but if the cars are smaller i use coke cans for the roof fin and door bars
hope this helps ;D
|
|
|
|
Post by bangerboy on Dec 2, 2008 12:28:14 GMT -1
if you are trying to achieve a "steel" look effect on the wheels, paint them black  |
|
|
|
Post by Dan on Dec 2, 2008 15:52:16 GMT -1
if you are trying to achieve a "steel" look effect on the wheels, psint them black ive just done that on my TSB volvo ;D |
|
|
|
Post by daveyca55 on Dec 13, 2008 18:15:25 GMT -1
When doing complicated signwriting, draw the outline of the font on your model with marker pen first and then paint over it!
|
|
|
|
Post by snakey13 on Apr 17, 2009 2:17:02 GMT -1
Pencil to mark out signs is alot more effective as you can rub out any mistakes Also, if making a limo from 2 identical model that you have chopped in half...wen filing down and trying to make them fit as best as poss, hold the 2 ends in place, and look at the joints infront of you computer scren, or tv of anything light...this will show exactly which bits need smoothing etc. |
|
|
|
Post by snakey13 on Jun 12, 2009 14:40:58 GMT -1
Making A Chain From Scratch. How I Do It. Sorry for poor photo quality. Step1: You will need...Some thickish metal wire stuff (depending on how thick you want the links) and some thin tip pliers. 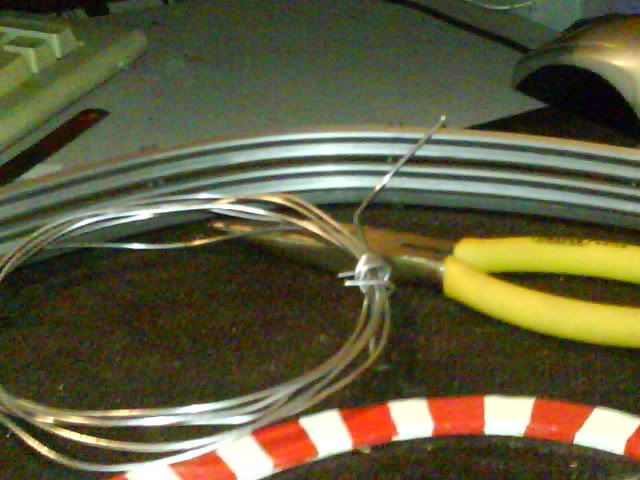 Step2: Put say 1mm of the wire in the pliers and grip it. 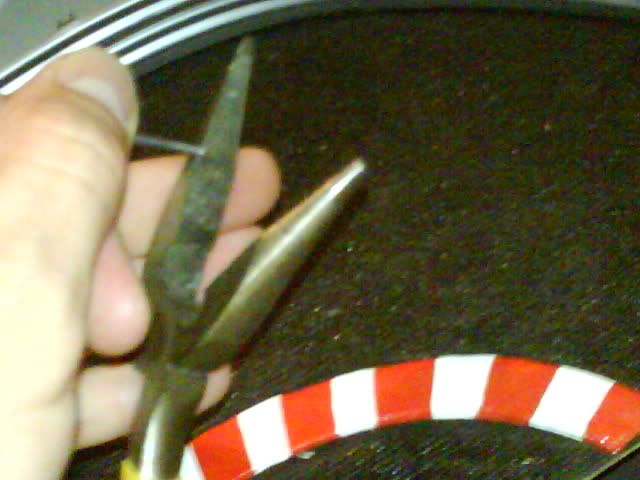 Step3: Bend this about 180 degrees. 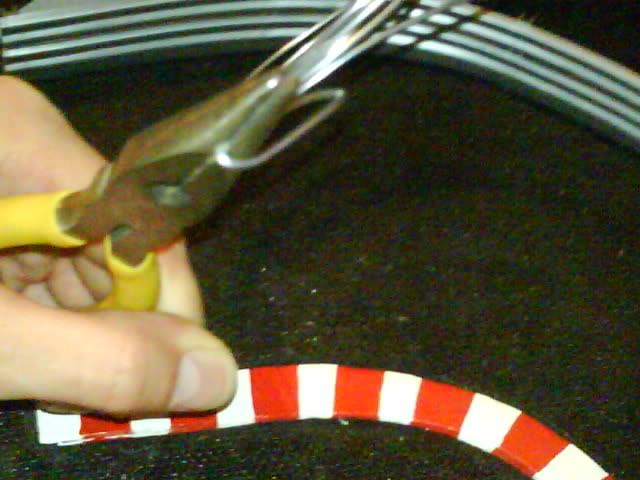 Step4: Use the tip of the pliers and grip the same bit you just bent. 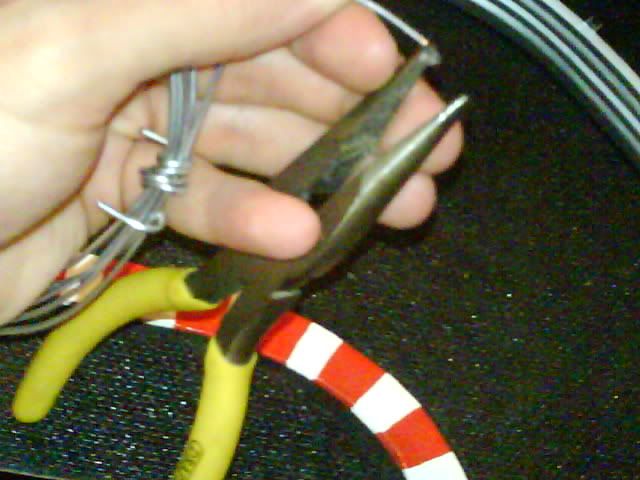 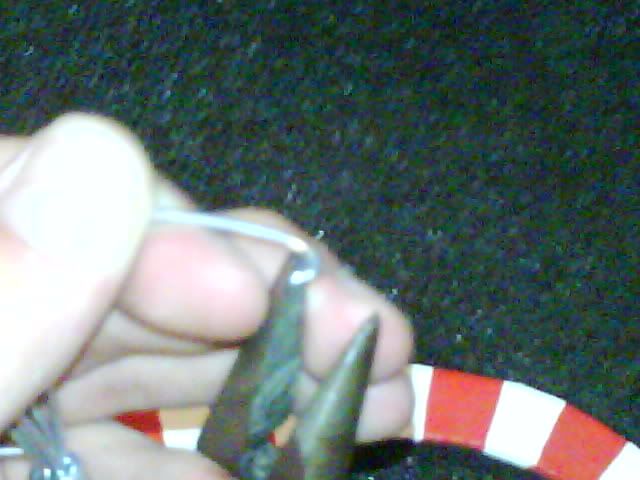 Step5: Bend this bit round till you have a kind of circle curl. 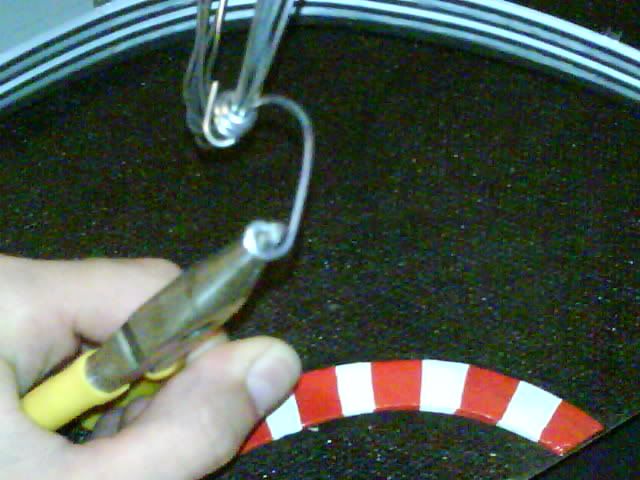 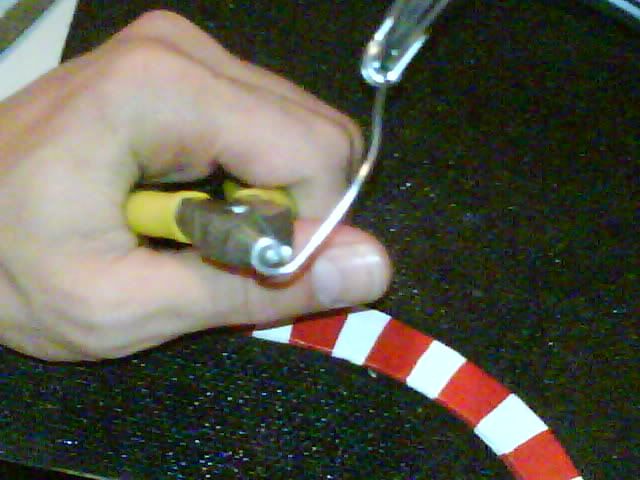 Step6: Now you need to cut the curl off as close to the curl as possible. 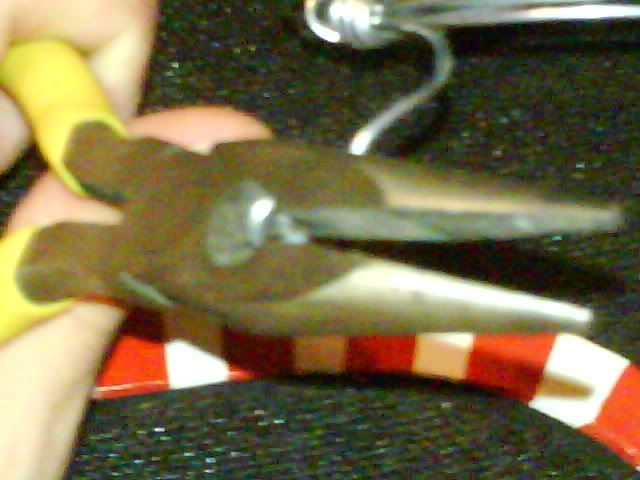 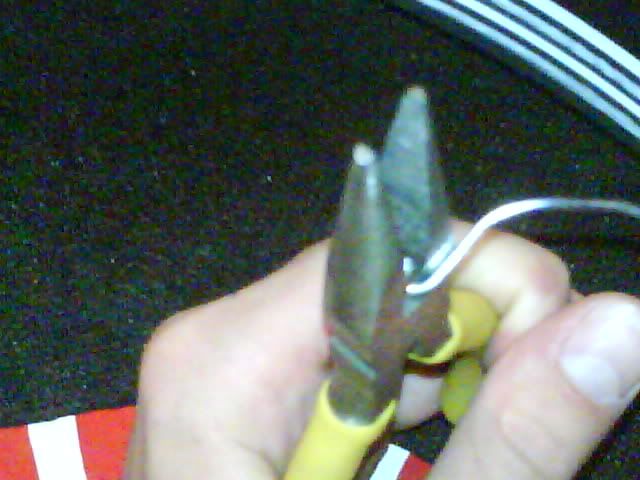 Step7: After cuttng the curl off you should have a single link like so.  Step8: Make more of the same the same way till you have enough. 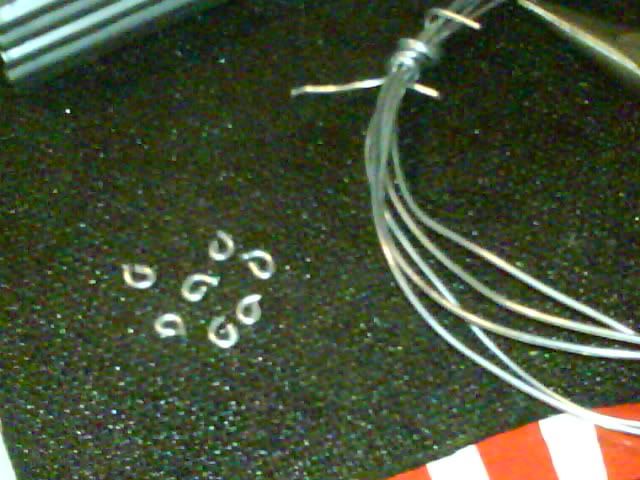 Step9: Link them together whilst opening and closing the links so they fit inside one another using the pliers. 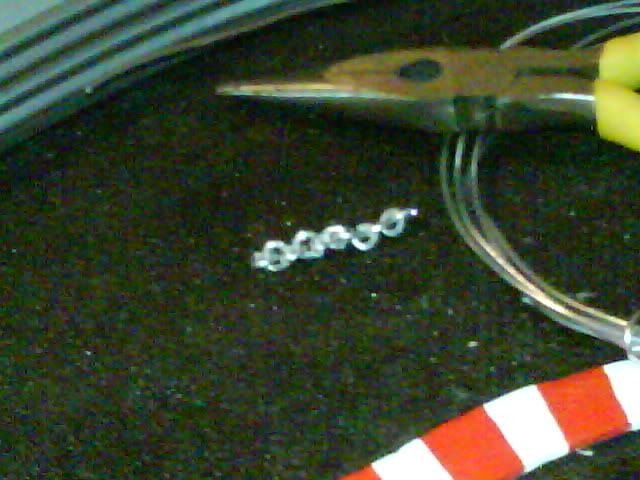 Step10: Glue each end link to the undersides of both cars at the places you want them. My cars wll be infront of one another like this. 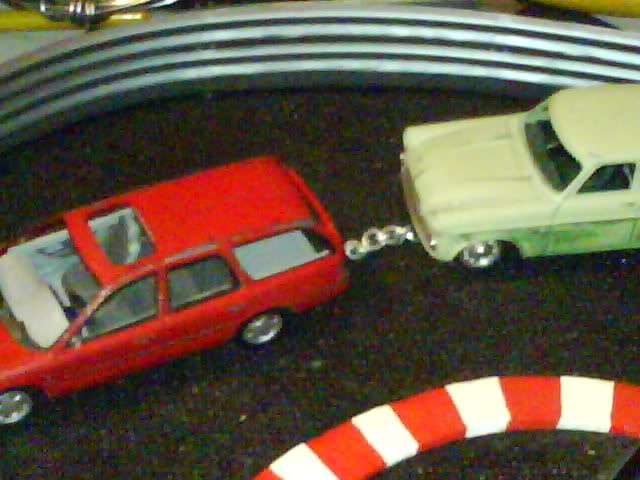 And your done, note on the last pic mine arnt glued in place as i need to finish the 2 cars first. Hope this is useful to someone. Cheers |
|
|
|
Post by brian200 on Jun 12, 2009 15:39:27 GMT -1
Very clever thinking mate, i was wondering what i could use for mine and you gave me some ideas, cheers |
|
|
|
Post by Daz10 on Jun 12, 2009 18:53:01 GMT -1
very cool |
|
|
|
Post by Dan on Jun 13, 2009 9:40:09 GMT -1
what a clever idea nice one!
|
|